Donnerstag, 22. Januar 2015

Cleaning up Ubuntu 14.10,14.04,13.10 system


Remove partial packages
This is yet another built-in feature, but this time it is not used in Synaptic Package Manager. It is used in the Terminal. Now, in the Terminal, key in the following command
sudo apt-get autoclean
Then enact the package clean command. What this commnad does is to clean remove .deb packages that apt caches when you install/update programs. To use the clean command type the following in a terminal window:
sudo apt-get clean
You can then use the autoremove command. What the autoremove command does is to remove packages installed as dependencies after the original package is removed from the system. To use autoremove tye the following in a terminal window:
sudo apt-get autoremove
Remove unnecessary locale data
For this we need to install localepurge.Automagically remove unnecessary locale data.This is just a simple script to recover diskspace wasted for unneeded locale files and localized man pages. It will automagically be invoked upon completion of any apt installation run.
Install localepurge in Ubuntu
sudo apt-get install localepurge
After installing anything with apt-get install, localepurge will remove all translation files and translated man pages in languages you cannot read.
If you want to configure localepurge you need to edit /etc/locale.nopurge
This can save you several megabytes of disk space, depending on the packages you have installed.
Example:-
I am trying to install dicus using apt-get
sudo apt-get install discus
after end of this installation you can see something like below
localepurge: Disk space freed in /usr/share/locale: 41860K
Remove "orphaned" packages
If you want to remove orphaned packages you need to install deborphan package.
Install deborphan in Ubuntu
sudo apt-get install deborphan
Using deborphan
Open Your terminal and enter the following command
sudo deborphan | xargs sudo apt-get -y remove --purge
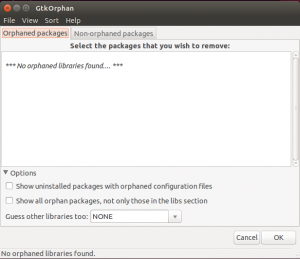
Remove "orphaned" packages Using GtkOrphan
GtkOrphan (a Perl/Gtk2 application for debian systems) is a graphical tool which analyzes the status of your installations, looking for orphaned libraries. It implements a GUI front-end for deborphan, adding the package-removal capability.
Install GtkOrphan in Ubuntu
Open the terminal and run the following command
sudo apt-get install gtkorphan
Screenshot
4
Remove Orphan packages using Wajig
simplified Debian package management front end.Wajig is a single commandline wrapper around apt, apt-cache, dpkg,/etc/init.d scripts and more, intended to be easy to use and providing extensive documentation for all of its functions.
With a suitable sudo configuration, most (if not all) package installation as well as creation tasks can be done from a user shell. Wajig is also suitable for general system administration.A Gnome GUI command ‘gjig' is also included in the package.
Install Wajig in Ubuntu
Open the terminal and run the following command
sudo apt-get install wajig
Debfoster --- Keep track of what you did install
debfoster maintains a list of installed packages that were explicitly requested rather than installed as a dependency. Arguments are entirely optional, debfoster can be invoked per se after each run of dpkg and/or apt-get.
Alternatively you can use debfoster to install and remove packages by specifying the packages on the command line. Packages suffixed with a --- are removed while packages without a suffix are installed.
If a new package is encountered or if debfoster notices that a package that used to be a dependency is now an orphan, it will ask you what to do with it. If you decide to keep it, debfoster will just take note and continue. If you decide that this package is not interesting enough it will be removed as soon as debfoster is done asking questions. If your choices cause other packages to become orphaned more questions will ensue.
Install debfoster in Ubuntu
Open the terminal and run the following command
sudo apt-get install debfoster
Using debfoster
to create the initial keepers file use the following command
sudo debfoster -q
you can always edit the file /var/lib/debfosterkeepers which defines the packages you want to remain on your system.
to edit the keepers file type
sudo vi /var/lib/debfoster/keepers
To force debfoster to remove all packages that aren't listed in this list or dependencies of packages that are listed in this list.It will also add all packages in this list that aren't installed. So it makes your system comply with this list. Do this
sudo debfoster -f
To keep track of what you installed additionally do once in a while :
sudo debfoster
xdiskusage -- Check where the space on your hard drive goes
Displays a graphic of your disk usage with du.xdiskusage is a user-friendly program to show you what is using up all your disk space. It is based on the design of the "xdu" program written by Phillip C. Dykstra. Changes have been made so it runs "du" for you, and can display the free space left on the disk, and produce a PostScript version of the display.xdiskusage is nice if you want to easily see where the space on your hard drive goes.
Install xdiskusage in Ubuntu
sudo apt-get install xdiskusage
If you want to open this application you need to use the following command
sudo xdiskusage
5
Once it opens you should see similar to the following screen
Bleachbit
BleachBit quickly frees disk space and tirelessly guards your privacy. Free cache, delete cookies, clear Internet history, shred temporary files, delete logs, and discard junk you didn't know was there. Designed for Linux and Windows systems, it wipes clean a thousand applications including Firefox, Internet Explorer, Adobe Flash, Google Chrome, Opera, Safari,and more. Beyond simply deleting files, BleachBit includes advanced features such as shredding files to prevent recovery, wiping free disk space to hide traces of files deleted by other applications, and vacuuming Firefox to make it faster. Better than free, BleachBit is open source.
Install Bleachbit in ubuntu
Open the terminal and run the following command
sudo apt-get install bleachbit
6
Using Ubuntu-Tweak
You can also Use Ubuntu-Tweak to clean up your system

Mittwoch, 12. Februar 2014

Get better performance and life from your SSD in Linux-based systems

Rule 1: Special flags for your mounts

For all SSD devices in your system remove ‘relatime’ if present and add ‘noatime’ so it looks something like this:

/dev/sdaX  /  ext4  defaults,noatime,errors=remount-ro  0  1
/dev/sdaY  /home  ext4  defaults,noatime,errors=remount-ro  0  2

Rule 2: If it’s temporary move it to RAM

Every day applications generat a lot of log files so to reduce unnecessary writes to the SSD move the temp directories into a ram disk using the ‘tmpfs’ filesystem, which dynamically expands and shrinks as needed.
In your /etc/fstab, add the following:

tmpfs  /tmp  tmpfs  defaults,noatime,mode=1777  0  0
tmpfs  /var/spool  tmpfs  defaults,noatime,mode=1777  0  0
tmpfs  /var/tmp  tmpfs  defaults,noatime,mode=1777  0  0

On the following example the size of the filesystem is 512 megabyte, if you use "defaults" it's 50% of the RAM.

tmpfs  /tmp  tmpfs  size=512m,noatime,mode=1777  0  0
tmpfs  /var/spool  tmpfs  size=512m,noatime,mode=1777  0  0

tmpfs  /var/tmp  tmpfs  size=512m,noatime,mode=1777  0  0


Rule 3: Perform TRIM cleanups periodically

Trim by “Batched Discard” is very simple. This can be manually with the following command in a terminal with root privileges or, for example, regularly via cron job to perform.

sudo fstrim -v /

If you want to let a Batched Discard regularly run automatically so that a straight editor with root privileges , the file /etc/cron.weekly/batched_discard (weekly) or /etc/cron.daily/batched_discard (daily) with the following content:

#!/bin/sh
# call fstrim to trim all mounted file systems which support it
set -e
LOG = /var/log/batched_discard.log
echo "*** $(date -R) ***" >> $LOG
exec /usr/sbin/fstrim -v / >> $LOG

chmod +x batched_discard
 I think that crond.service is enabled by default in Fedora, but doesn't hurt to check.

systemctl status crond.service
 
That's it.
 

Montag, 3. Februar 2014

Yum: Pakete einfach mittels swap-Kommando austauschen

Wer z.B. XChat durch Hexchat austauschen möchte, der macht das im Terminal in der Regel mittels

su -
yum remove xchat
yum install hexchat
Es geht jedoch deutlich einfacher, wenn man das swap-Kommando von yum nutzt:
su -c'yum swap xchat hexchat'
In diesem Beispiel wird yum mittels swap-Kommand angewiesen, das Paket xchat zu löschen und gleichzeitig das Paket hexchat zu installieren. Das swap-Kommando bietet noch einige andere Möglichkeiten, Pakete auszutauschen, die man in den Man-Pages von yum nachlesen kann.

Sonntag, 22. Dezember 2013

Screenshots in Fedora

The default behaviour when pressing the PrintScreen key is to automatically place your screenshot in the Pictures folder in your home directory (i.e. "~/Pictures"). The click and the flash mean that the screenshot has been taken, so just check the Pictures folder for your screenshot.
Other than just the "Print Screen' key, which saves your whole Desktop to the Pictures folder, GNOME3 also has the following shortcuts enabled by default for screenshot actions:
  • PrintScreen -- Takes a screenshot of your entire desktop and saves it to the Pictures folder.
  • Alt + PrintScreen -- Saves a screenshot of the focused window to the Pictures Folder
  • Shift + PrintScreen -- Lets you select an area of the screen, and saves to the Pictures Folder
  • Ctrl + PrintScreen -- Takes a screenshot of your entire desktop and copies it to the clipboard.
  • Ctrl + Alt + PrintScreen -- copies a screenshot of the focused window to the clipboard.
  • Ctrl + Shift + PrintScreen -- Lets you select an area of the screen, and copies it to the clipboard.
  • Ctrl + Shift + Alt + R -- Records a Screencast) of your entire desktop and saves it to your Videos folder.
These shortcuts also can be changed in the GNOME keyboard settings if your keyboard does not have a PrintScreen key.

Is there a GUI for taking screenshots, rather than keyboard shortcuts?
If you want a little bit more control over your screenshots, you can also use the GNOME screenshots tool that is included in Fedora by default (search for "Screenshot" in the overview). It provides you a simple GUI for changing settings such as showing the cursor, and screenshot delays:
image description
I take a lot of screenshots, is there a tool for that?
Yes! Consider trying out shutter (sudo yum install shutter). It provides a session for taking a whole bunch of screenshots, editing and applying filters. It also has a whole lot more options than the default GNOME screenshot tool, such as being able to redo a previous screenshot, taking screenshots of webpages, and screenshots of menus.
image description

Sonntag, 17. November 2013

Dropbox Daten verschlüsseln mit EncFS

Eine Möglichkeit die Daten, welche auf den Dropboxserver hochgeladen werden, zu verschlüsseln stellt “Encfs” dar. Gegenüber Truecrypt hat EncFS den Vorteil, dass nur der tatsächlich für die verschlüsselten Dateien benötigte Speicherplatz belegt wird und nicht schon im Vorfeld große (zu synchronisierende) Container angelegt werden müssen. Folgende Pakete müssen dazu installiert werden

encfs
und

cryptkeeper
als grafische Oberfläche.

Um ein verschlüsseltes Verzeichnis anzulegen wird ein “Terminal” geöffnet, der folgende Befehl legt das Verzeichnis (Dropbox_encfs) an.

encfs ~/Dropbox/.Dropbox_encfs ~/Dropbox_encfs
jetzt wird gefragt ob die noch nicht vorhandenen Verzeichnisse angelegt werden sollen

y
und

y
bestätigen das, wer sich nicht mit Verschlüsselungsgeschichten auskennt wählt dann den “Paranoia-Modus”

p
jetzt das Passwort noch zweimal eingeben und jeweils bestätigen und das verschlüsselte Verzeichnis ist angelegt und geöffnet.

Ist das erledigt wird “Crypkeeper” gestartet. “Anwendungen” -> “Systemwerkzeuge” -> “Cryptkeeper“. Im Panel erscheint ein kleines Icon cryptkeeper_icon, ein Linksklick öffnet die Optionen.

Hier wird “Importiere EncFS Ordner” gewählt und das Verzeichnis “.Dropbox_encfs” (die Datei ist versteckt deshalb <Strg>+<H>drücken um die versteckte(n) Datei(n) anzuzeigen) im Ordner “/home/BENUTZERINNENNAME/Dropbox” makiert.

“Vor” drücken und es wird nach einem Ort gefragt wo der EncFS Ordner eingebunden werden soll. Hier wird das beispielsweise das “Home“-Verzeichnis gewählt (wichtig: nicht der Dropboxordner!) und ein Name angegeben “Dropbox_encfs” bietet sich an. Nocheinmal “Vor“.

Dann sollte das Verzeichnis erfolgreich in “Cryptkeeper” importiert worden sein.

Jetzt kann es über das Cryptkeeper Icon im Panel ein- und ausgehängt werden.

Donnerstag, 14. November 2013

Flash Android Factoryimage without loss of Data ....

... with fastboot (works fine with eg. Android 6.0.0)


Make sure your computer recognizes your device by typing: fastboot devices
If not, then try this:

# reboot into fastboot mode
adb reboot bootloader

# grab you fastboot/bootloader device ids
lsusb
> Bus 001 Device 035: ID **18d1:d00d** Google Inc.

# install the ids into /etc/udev/rules.d/99-android.rules
SUBSYSTEM=="usb", ATTR{idVendor}=="18d1", ATTR{idProduct}=="d00d", MODE="0666", OWNER="username"

# restart udev
/etc/init.d/udev restart

# try fastboot (only on bootloader mode)
fastboot devices


Unlock your bootloader (if you have not already done so): fastboot oem unlock
You will see a prompt on your device. This will wipe your entire device (including the /sdcard folder). Accept. Note: you use the volume keys to change the option and the power button to accept. You cannot use the touch screen.
#Reboot by typing: 

fastboot reboot-bootloader
#Flash the bootloader: 

fastboot flash bootloader bootloader-mako-makoz10o.img (or whatever the name of the bootloader image is).
#Reboot: 

fastboot reboot-bootloader
#Flash the radio: 
 (if available)
fastboot flash radio radio-mako-m9615a-cefwmazm-2.0.1700.48.img (or whatever the name of the radio image is).
#Reboot: 

fastboot reboot-bootloader
#Flash the system partition: 

fastboot flash system system.img
Optional, but read note. Flash the data partition: 

fastboot flash userdata userdata.img Note: this command will wipe your device (including /sdcard), EVEN if your bootloader is already unlocked.
#Flash the kernel/ramdisk: 

fastboot flash boot boot.img
#Flash the recovery partition: 

fastboot flash recovery recovery.img (don't flash if you have a custom recovery rom)
#Flash the vendor: (if available)
fastboot flash vendor vendor.img
#Erase the cache partition: 
fastboot format cache
#Reboot: 

fastboot reboot
Done! The first boot will likely take quite a bit longer than you are used to, as Android builds the Dalvik cache. 


#Reboot:
adb reboot bootloader
#Flash the recovery partition: 
fastboot flash recovery twrp-2.8.7.0-mako.img (or whatever the name of the recovery image is).
#Reboot: 
fastboot reboot-bootloader
#Optional flash SuperSu with your favorite RecoveryROM to have rootaccess

#Reboot to Recovery from fastboot (eg. if the Volumebuttons are defect)
fastboot boot recovery.img (or whatever the name of the recovery image is).

Fedora 18 (preconfigure)

sudo yum install vino

you can change it after installing by using the hostnamectl command. Hostname is now in your /etc/hostname file and not in /etc/sysconfig/network
sudo hostnamectl set-hostname <newhostname> --static

sudo service sshd start
sudo chkconfig sshd on
service sshd status

sudo systemctl stop firewalld.service
sudo systemctl disable firewalld.service

sudo vi /etc/sysconfig/selinux
# This file controls the state of SELinux on the system.
# SELINUX= can take one of these three values:
#enforcing - SELinux security policy is enforced.
#permissive - SELinux prints warnings instead of enforcing.
#disabled - SELinux is fully disabled.
SELINUX=disabled # change
# SELINUXTYPE= type of policy in use. Possible values are:
#targeted - Only targeted network daemons are protected.
#strict - Full SELinux protection.
SELINUXTYPE=targeted